
Sow the Spectrum: Starting a Dye Garden from Seed


(above) Japanese indigo from seed to dyed fabric
An earlier version of this post was first featured in the Dogwood Dyer’s March 2024 tutorial from A Year in Natural Dyes. If you are looking to expand your knowledge of the natural dye process, we highly recommend getting an AYIND subscription.
Witnessing the simple yet remarkable act of seeds bursting to life after months or even years of dormancy is one of our favorite things, and it's a process that only seems more miraculous each year. This guide aims to demystify this amazing process, offering practical information to help you establish a vibrant dye garden of your own. Included is a list of essential supplies, a straightforward tutorial on effective germination techniques, and considerations for plant selection based on factors like available space, time commitment, and your local environment. For additional plant-specific growing information, please refer to variety listings on our Dye Plant page. We hope that whether you are a seasoned gardener or a budding enthusiast, you learn something new about seed starting or natural dyes that will help you on your gardening journey!
Note: Each section of this post is designed to be a starting point (everything from supplies needed, to a section on dye plant selection). While we can’t cover every nuance of seed starting, we hope the information here helps guide your next steps. Gardening and farming often spark passionate debates about the "right" way to do things, but we believe there are many ways to reach your dream garden. If one approach isn’t working, try another! We’re sharing what has worked well for us, but with so many variables at play when working with living things, there’s no one-size-fits-all solution. Over time, you'll refine what works best for your unique needs and environment.


(left) Guy, excited to be saying goodbye to winter, and hello to spring seed-starting! (right) A skein of safflower dyed yarn drying in our propagation greenhouse.
“Though I do not believe that a plant will
spring up where no seed has been, I have
great faith in a seed. Convince me that you
have a seed there, & I am prepared to
expect wonders.”
Seed Starting Supplies
Below is a recommended list of seed starting supplies. Each item will be addressed in the tutorial that follows. Some items on this list are indispensable, while others cater to the specific needs of the seeds you're cultivating and/or the environment you're working in. Many of the items can be switched out for common household items e.g. used plastic bags in lieu of a humidity dome, or an old egg carton as little seed pots. Get creative!
Recommended
High quality seeds!
Seed starting mix or screened potting soil
Container for hydrating seed starting mix
Starting trays, pots, or soil blocks
Plant markers (we prefer popsicle sticks)
Gentle watering (can, bottom water, wand)
Specific regional growing recommendations
from your local gardening community
Optional
Seed starting heat mat
Humidity domes
Full spectrum LED grow lights
Electric timer for grow lights
Fertilizer (slow release or mild liquid)
Dibbling tool
Small fan
Beyond the supplies outlined above, cultivating a positive and experimental mindset will be your greatest asset. Embrace the journey of trial and error with enthusiasm; seed starting involves so many variables, and many of them are not black and white. Even with decades of experience starting seeds, we still encounter new challenges each year. Let every success and setback shape your approach to the next growing season. Enjoy the learning process!

Direct Sowing
This method of growing seeds requires the least supplies, and can be the easiest way to grow plants. Many plants prefer to be directly sown into your garden, instead of getting a head start indoors and transplanted after your last frost date. Because your specific climate will dictate when and how you direct seed plants, we suggest obtaining a planting schedule and other direct seeding recommendations from your local nurseries, gardening clubs, community gardens, botanical gardens, master gardeners, or university extension services. Many of these entities offer free guides.


(above) Sunflowers, like this Hopi black dye sunflower, will perform best when direct sown. Pictured above, you can see Guy using mesh paint strainers to cover developing seed heads in order to keep birds from eating the dye crop. On the bottom row you can see the gray-lavender dye on wool yarn and on a cotton bandana. The seeds can also be used for eco printing.
Before direct sowing seeds, make sure the planting area is clear of weeds and has some organic compost mixed into the soil to provide necessary nitrogen (at the recommended rate for the type of compost you use). Generally speaking, we like to plant seeds in groups of 2-4 seeds per hole at the appropriate spacing for the variety being planted. For example, for safflower seeds, we’ll plant 2-4 seeds in a hole that is roughly 2-3 times as deep as the seed is wide. We plant each group of seeds 1 foot apart from each other, then slightly pat down after burying seeds to ensure they have direct contact with the soil, then water them in. When the seeds have germinated, we thin each seedling group leaving the strongest seedling (more on seedling selection and thinning later on).
For large seeds like sunflowers and safflower that are very attractive to birds and rodents, you may want to consider planting more seeds than usual to guarantee some aren’t discovered by seed predators. You can also consider placing some frost cloth over a planting area to keep birds from digging up the seeds. Remove the frost cloth after the plants have emerged from the soil.
Many taprooted plants such as weld, safflower, and sunflowers will perform much better when directly sown into their permanent home, as they don’t like their roots disturbed. If you do transplant these varieties, take special care with their roots during transplanting and ensure that the tap root has enough space to go straight down, and the tip isn’t bent upwards.
Some plants prefer very cool temperatures for germination, for these plants, direct sowing in early spring is the best option. Examples of these plants include onions, breadseed poppies, calendula and many plants native to climates with cold winters. Other plants prefer temperatures much warmer than your house, and will grow quickly from seed when planted in late spring or early summer. Tango cosmos is one of these varieties that loves warm weather for germination.


(above) Safflower, one of many species that prefers to be direct sown when soils are warm in late spring or early summer. The flowers produce multiple yellow dye compounds that bind to mordanted wool, and carthamin, which is a substantive pink/red dye on cotton.
When direct sowing seeds, make sure to stay on top of weeding, as weed seeds will likely be growing at the same pace, or sometimes even faster than the seeds that you planted. You’ll also want to make sure that the soil stays moist so that seedlings don’t dry out while germinating.

“Four seeds in a row: One for the mouse, one for the crow, one to rot, one to grow.”
Seed Starting Mix
If you are planning on starting seeds indoors to transplant after your last frost date, it is important to get a good seed starting mix. There are many good recipes online for creating your own propagation mix, but for beginners and small-scale growers, getting a prepared bag from your local nursery can take away the guesswork, decrease the amount of space needed to store bulk ingredients, and can be more economical at the home scale.
A high-quality seed starting mix has good drainage (usually in the form of perlite and/or vermiculite), and peat moss and/or coconut coir for water retention. Unlike potting soil, a seed starting mix typically doesn’t have soil or compost included, resulting in a finer texture with fewer nutrients. Each seed that you plant will have its own food storage in its endosperm, so they don’t need much fertilizer when they are just starting to grow. Small amounts of compost or fertilizer are okay, but having too much nitrogen can burn the seedling’s roots, causing them to die. If you are growing your seeds indoors, a low nutrient seed starting mix will also be less appealing to fungus gnats than a potting soil. Over the years we’ve had more issues from having too much fertilizer than too little during the germination process.
After your seedlings have five or more true leaves, you can start giving them some supplemental organic fertilizer, or up-pot them into larger containers with nutrient rich potting soil (especially if they have outgrown their cell or container and are not ready to be transplanted outdoors). Nurseries will have lots of fertilizer options that are gentle enough for seedlings, we like to use watered down organic fish emulsion for our starts that may need a little boost before it’s time for planting outdoors.
If you opt to prepare your own mix (or decide to use potting soil instead of a seed starting mix), pass all the materials over a ½” screen to remove large chunks of peat, bark, rocks, or compost that make the mix coarser than is ideal. A chunky mix can impede small developing roots, and large pieces of bark or compost can shift around during watering, which may end up burying very small seeds and prevent germination. We made our screen from scrap wood and ½” screen material from our local hardware store. This screen also comes in handy for threshing dried sunflower seeds in a way that won’t destroy your hands! We can thresh a season’s worth of Hopi Black Dye sunflower seeds in about 15-20 minutes with this technique.


(above) Guy using a ½” screen to remove large clumps of bark and compost for a homemade seed starting mix. Also pictures is a before and after of a Hopi black dye sunflower head that was scraped on the screen to thresh the seeds.
Seed Starting Trays
There are so many styles of trays available (homemade, single use, reusable, soil block, etc). When choosing what to get, consider how big you want your plants to be when you transplant. For plants like dyer’s chamomile, scabiosa, and onions that can be transplanted outdoors while it’s still cold with some frosts, we like to use smaller-celled flats that have 50-72 cells per flat. For things that will be bigger when we transplant them, we like to use reusable 4-packs, 6-packs, or flats with inserts for 32 smaller pots. Experiment with different options to see what works best for you!
Before putting your seed starting mix into your trays, it’s very important to fully hydrate the mix. You can use a 5-gallon bucket, shallow storage tote, or wheelbarrow to integrate your mix with water. You’ll know you have enough water incorporated when you don’t see any dry chunks left, and it’s wet enough to hold its form when you grab a fist full and squeeze. There shouldn’t be standing water in the bottom of your mixing container, if it has become overly saturated, add a little more of the dry mix.
If you add seed starting mix to trays before hydrating, the mix will be quite hydrophobic, and when you water, the surface may appear to be moistened, but the water may not be saturating below the surface. When working with dry mix, make sure to always wear a mask to prevent incredibly fine perlite dust from irritating your lungs.
After your mix is hydrated, gently pack the soil into each cell. The goal is to get rid of large air gaps in each cell, but you don’t want to make it so compacted that it’s difficult for roots to establish. If your mix has small sticks, bark, or any other sharp organic components, make sure to wear gloves when mixing!


(above) Mixing seed starting mix with water until it holds its form and is not sopping wet. then pressing the mix into each cell to get rid of air pockets.
Planting Your Seeds!
Now comes the exciting part! Once your trays are filled with your seed starting medium, you get to plant those cute little seeds! The most important consideration at this stage is how deep to plant each species. A common rule of thumb is to plant seeds 2-3 times deeper than their width. A large madder seed for example would be planted up to ¼” deep, while something like a dyer’s chamomile seed or Japanese indigo would be barely covered with soil.


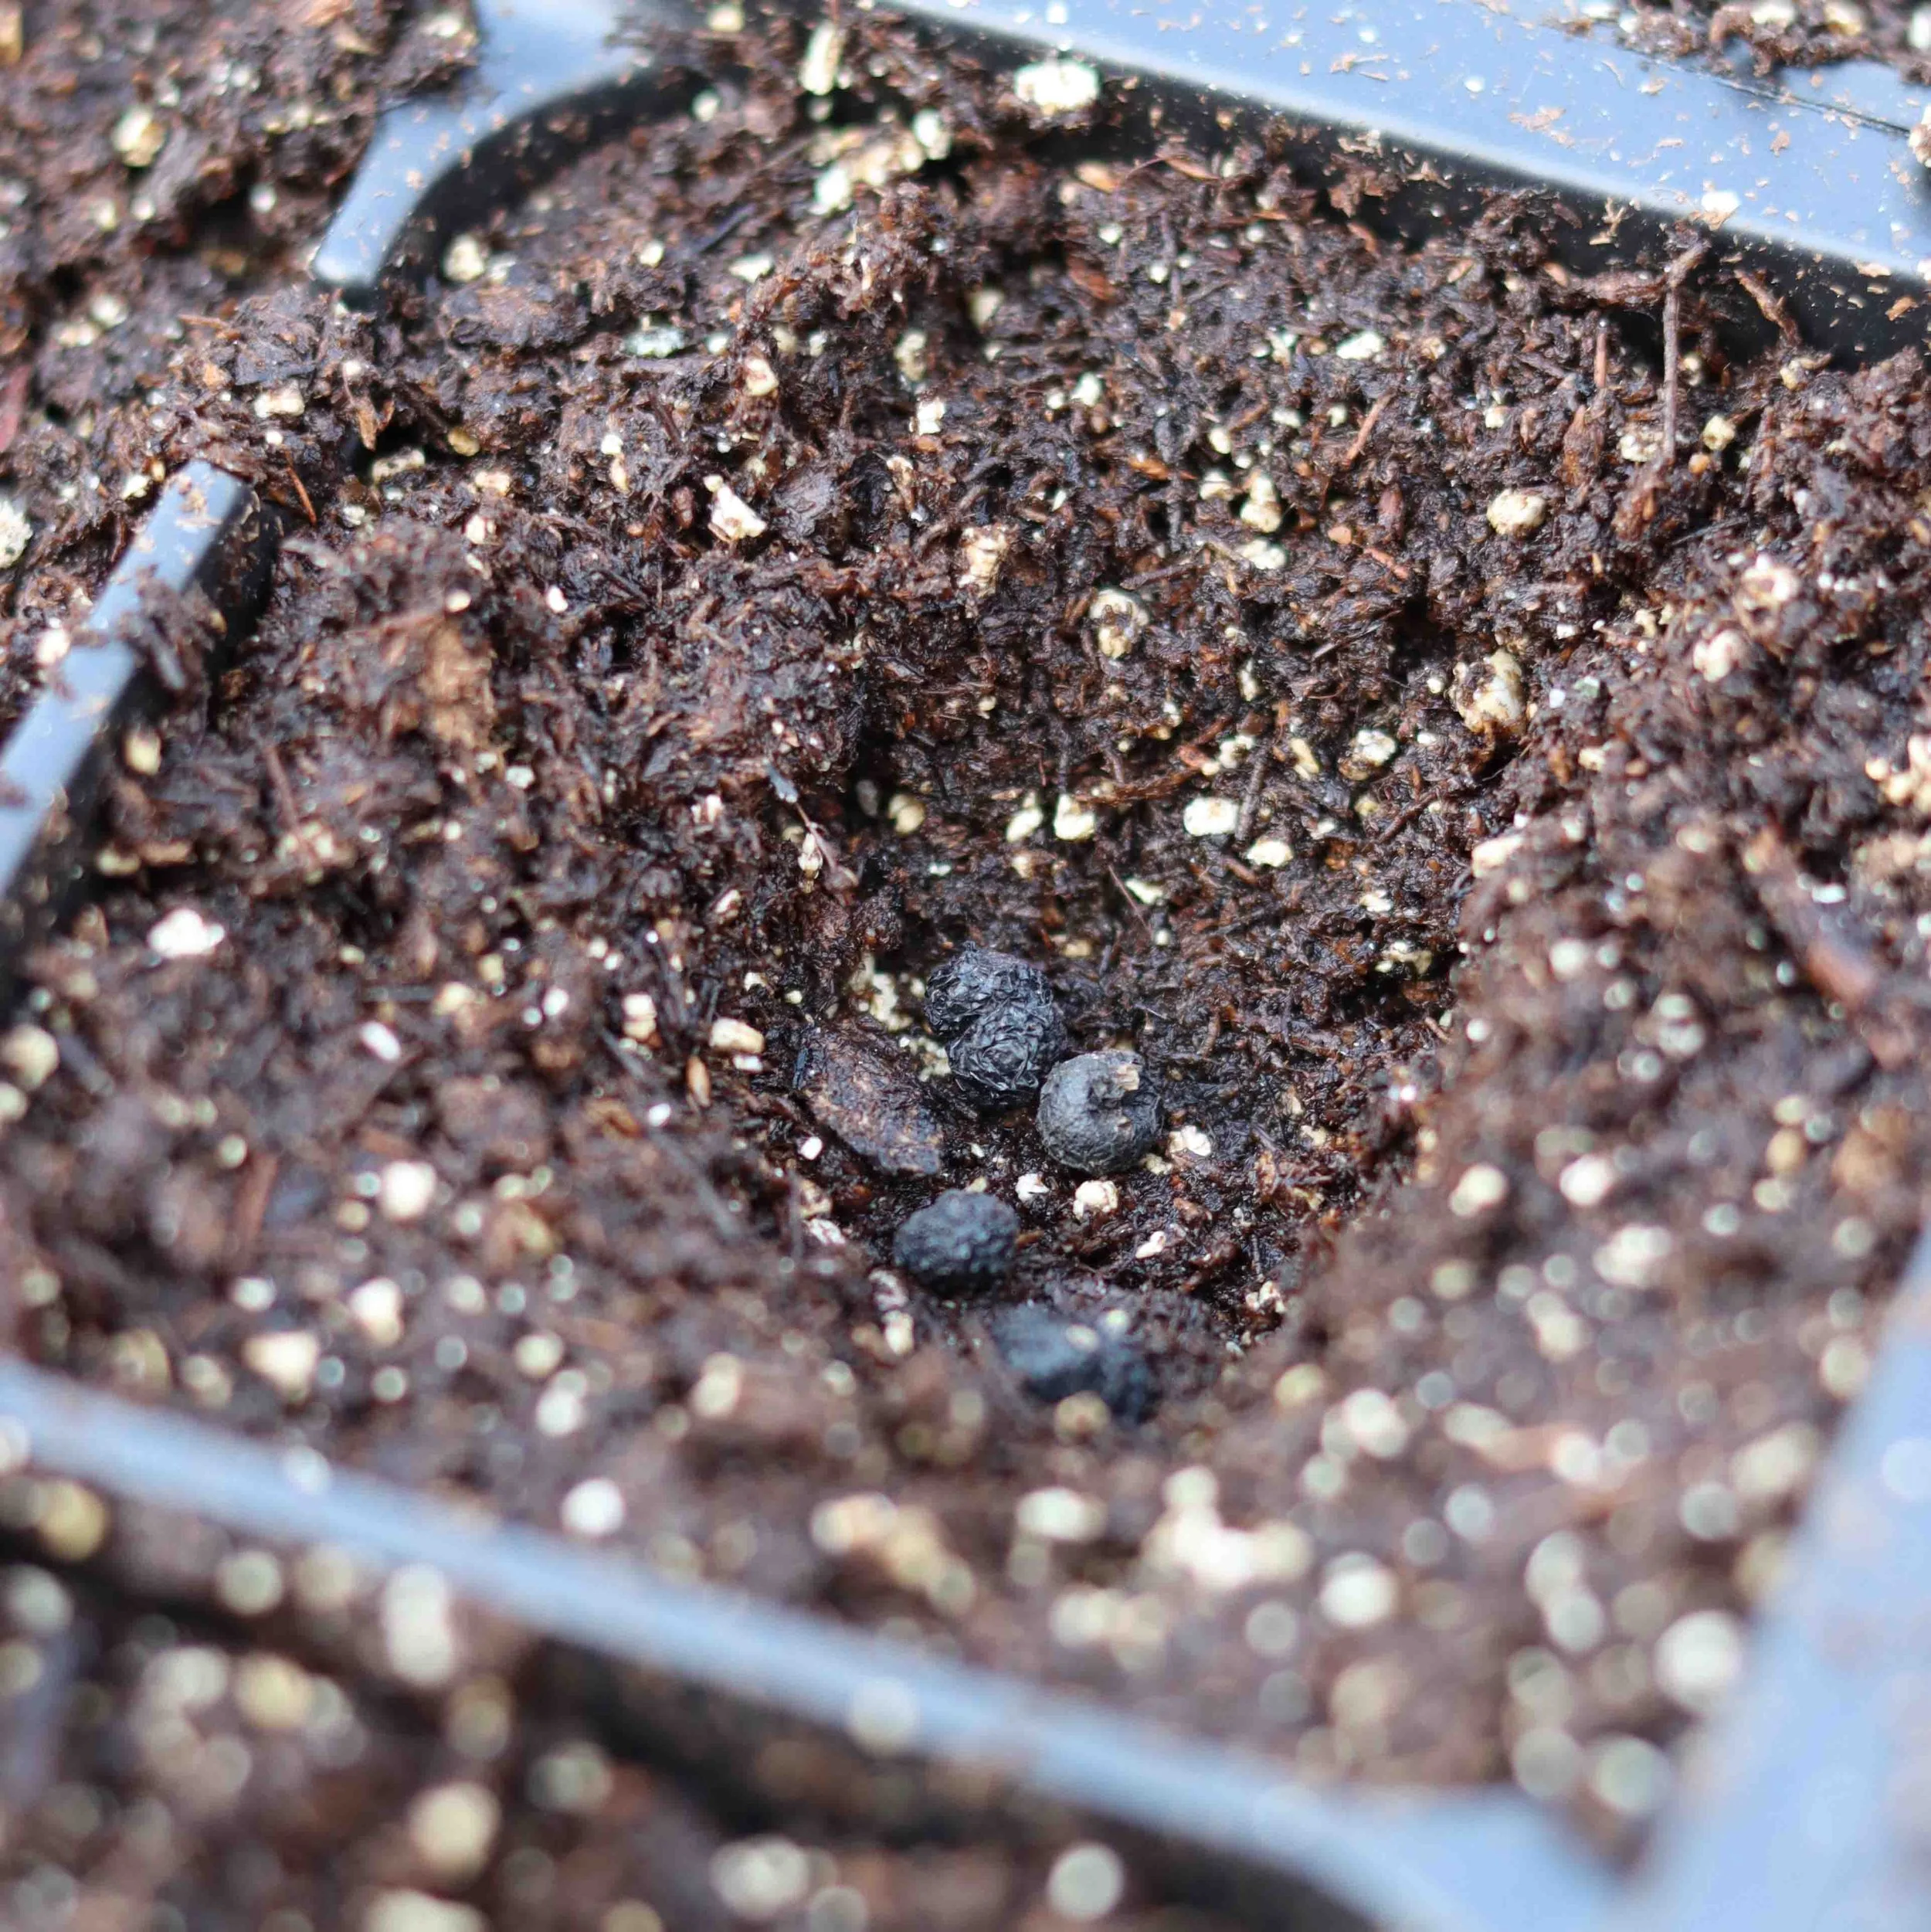


(above) Sowing madder seeds ¼” deep in reusable 4-pack containers (these are larger cells than the 50-plug trays we use for many varieties. This larger size allows their roots to get a little bigger before we transplant them outdoors). We like to sow multiple seeds per cell, and then select for the strongest seedling. We use our fingers to make the impressions that the seeds will be buried in, but you can use a pencil, sharpie, or any other small cylindrical object to make your divots.
Many small seeded plants, like weld, need light to germinate, and don’t have the capacity to force their way through deep soil, so they are placed on the surface instead of being buried. You’ll want to take extra care to keep the soil surface moist with surface sown seed, as they are the quickest to desiccate.
When you begin to plant your seeds, make sure to mark what seeds are in what cells. It’s easy to think you’ll remember who is who when planting, but it’s easy to mix things up, especially if you are growing multiple varieties of the same species. We like to use popsicle sticks from our local craft supply store to identify who is who. We write the name of the variety on the front of the stick, and then the date that the seed was planted on the back. We use felt tip pens or a pencil on our plant labels.
If you holding back some of your seeds from the current planting season to use next year, know that their germination rate may drop. Japanese indigo, for example, has a marked decrease in viability after a year of storage. For some species, fresh seeds should be used each season for best results. Save unused seeds in a dark, dry, cool place to extend their shelf life.
Watering
Once your seeds are planted, it’s important that they don’t dry out, so keep a close eye on them! You’ll want to make sure that a little water comes out of the bottom of the cells to ensure they have been fully wetted. Using a humidity dome over your flat can help prevent your cells from drying out in dry climates, and extend the amount of time between waterings. Humidity domes also help to keep out mice if you have a problem with them digging up your sprouting seeds. Our greenhouse stays relatively humid during propagation season, so we don’t use humidity domes. If you are using humidity domes, it’s nice to remove them after the seeds have germinated so you don’t have issues with fungal growth, or water-logged plants.


(left) Find a watering can or wand with fine-spray rose like this Haws watering can (right) When your plants are large enough to be hardened off, like these double black hollyhock starts, you can increase the water pressure to get them accustomed to heavy rain.
A common mistake people make, especially if they are watering with a hose, is having too much pressure, which will wash the seeds out of their flats. This is especially common with surface sown seeds, which can easily be washed off the surface with too much water at a time or too much pressure. In our greenhouse we like to use Dramm’s fan nozzle hose attachment for gentle and even watering. Indoors we use a haws watering can with a fine-spray rose. Once seedlings begin to grow and extend their roots, you may also like to bottom water their trays to absorb water from below.
If you have been dyeing for a while, you are probably acutely aware of how much water it can take to rinse unbound dyes from your project. When we have a dye project with a fairly neutral pH and a gentle dye like marigolds, we will save the final rinses that are almost clear for supplemental water for our garden beds. Make sure not to use the first rinses from your dye project, especially if there is lots of unbound mordant.
Temperature
Many plants will readily germinate at room temperature, especially domesticated plants that have lost their natural germination inhibitors. There are some however that will prefer it cooler or warmer than your home for optimal germination rates.
For plants that like it a bit cooler (calendula, larkspur, onions, bachelor’s buttons), you can put their tray in a cold windowsill or by a drafty door until the seeds germinate, then move the tray back to a high light setting.
For plants that require warmer temperatures for germination (cosmos, marigolds, butterfly pea, etc.), germination heat mats are readily available in nurseries, and are very effective. When using a heat mat, keep in mind that your flats will dry out much quicker than at room temperature, and water accordingly!
Having a gentle fan blowing on your starts can be helpful to decrease fungal issues, and also encourage the plants to be more robust. Having a fan on a low setting should be sufficient, and remember that using a fan, like using a heat mat, will dry out soil a little quicker.
If you are starting your seeds in a greenhouse, make sure to prevent temperature spikes. High temperatures can kill many seeds, and make the seeds of some species go dormant. Make sure your greenhouse has good ventilation, ideally with an exhaust fan set on a thermostat in case you are not around during a spike in heat. During the month of May here in Salt Lake City, our greenhouse can experience a range from below freezing temperatures on up to 100º degrees within a single day if not managed properly. Many small, store-bought, walk-in greenhouses, or cold frames can get hotter than you would imagine in late spring.
To propagate heat-loving seeds in our greenhouse, we’ve built a heated sand table. This is a good option for growers with hoop houses or greenhouses, or individuals that need more heated space than heat mats allow. We’ve created an Instagram reel to show you the process of assembling one. It can be found here: Heated sand table


(above) Our heated sand table doubles as a luxurious cat spa.
Light
Inadequate lighting is one of the biggest threats to seedlings grown indoors. When a seedling doesn’t get adequate light, it will become etiolated. An etiolated plant is stringy (as it reaches for the light), pale, and fails to thrive. Some etiolated seedlings can recover if provided with strong enough light in a timely manner, others won’t be able to bounce back once they are too lanky.
The further north you live, the less likely starting seedlings in a windowsill will be effective. LED grow lights have become relatively inexpensive, and will last for many growing seasons, they also use much less energy than fluorescent grow lights that were once more common. When growing indoors, we strongly recommend getting a grow light (we prefer full spectrum lights), and pairing it with an electric timer to ensure they get 14 hours of light a day. You can find some LED lights with integrated timers. When using grow lights indoors, get bottom trays without holes to set your flats in to contain excess water (but don’t let your plants become waterlogged!).
There are many small tent-like greenhouses on the market that can be useful for seed starting. If you opt for one, make sure to open the door or vent on hot days, and consider a little space heater for cold nights. Lightweight models may need extra reinforcement if you live in a windy area.

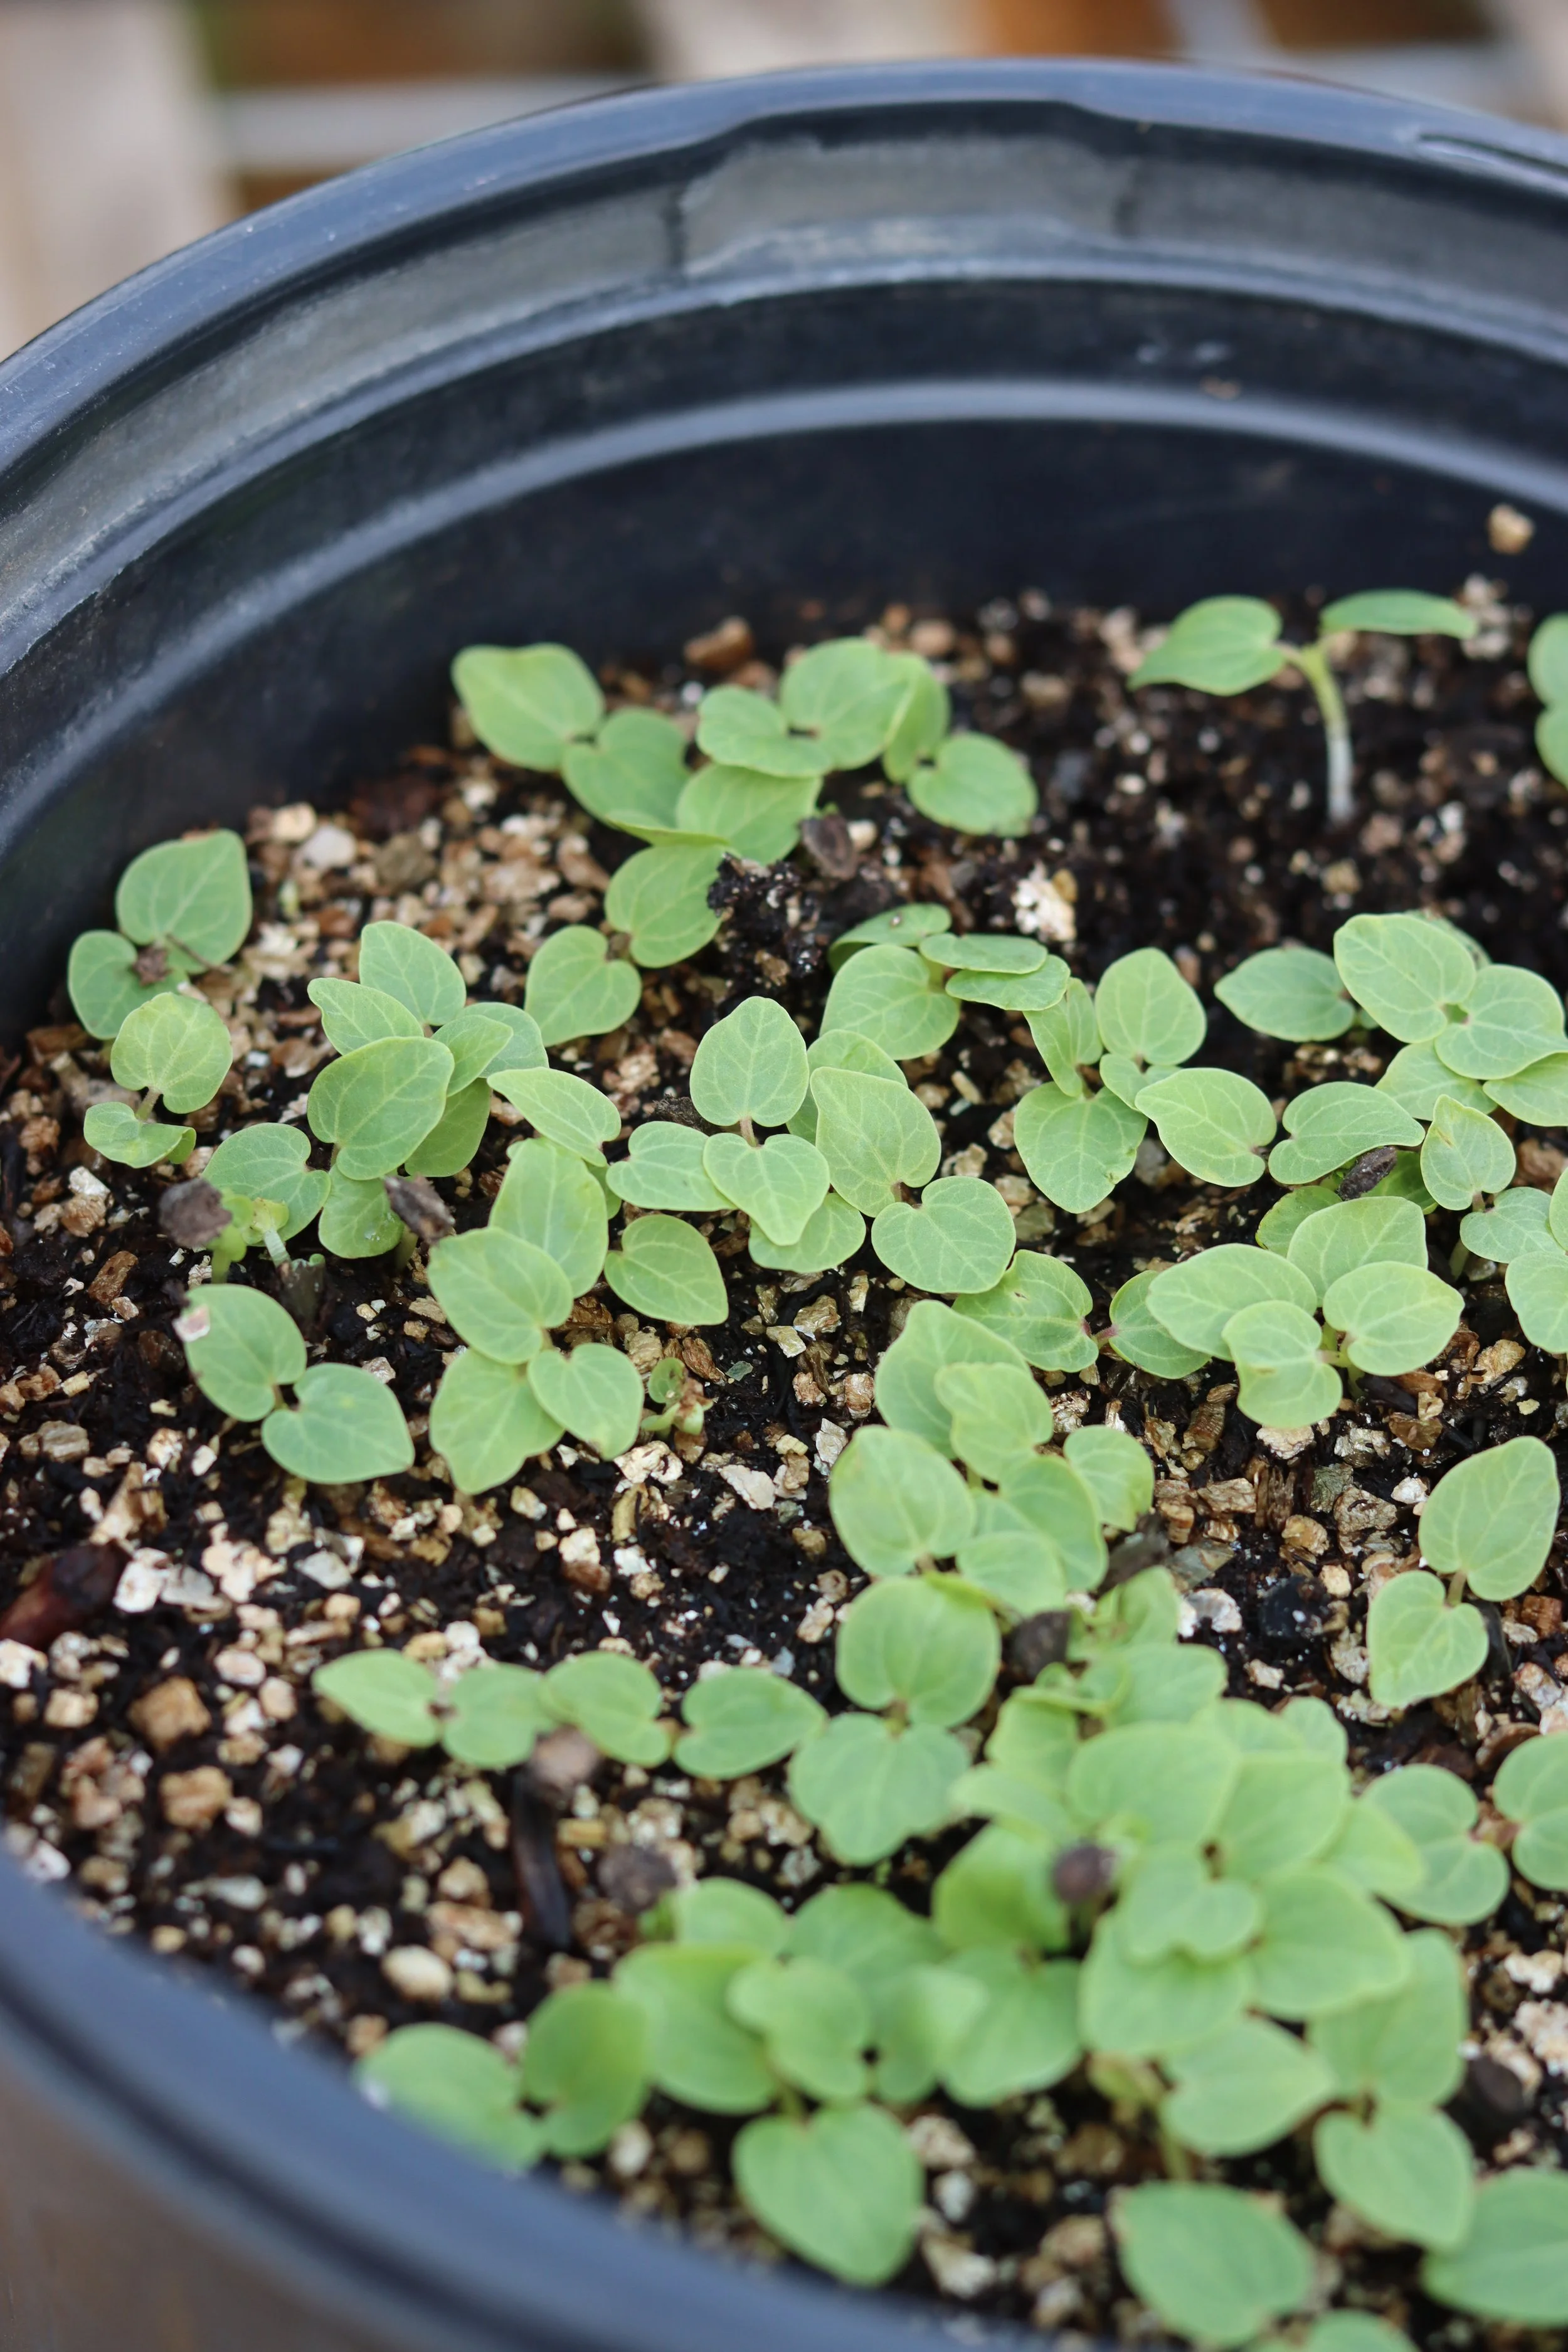
(above) A healthy growing calendula seedling that was direct sown outdoors in early spring (below) a petri dish full of calendula for a germination test conducted indoors without supplemental light. These seedlings are starting to become lanky, and showing signs of etiolation as they reach for a light source.

Thinning Seedlings
After your seedlings have germinated, it’s important to thin them promptly. This step is your first selection opportunity for a successful plant. Select the strongest and healthiest seedling in each cell, and remove the other seedlings. This is best to do when the seedlings are still little, so that their roots aren’t deeply intertwined, which can damage plants later on.
We are always looking to remove seedlings that look diseased, weak, or chlorotic (excessively pale). Make sure the seedling you are keeping in each cell has an apical meristem (growing tip). Plants that don’t have apical meristems will produce cotyledons (the first leaves of a seedling), but won’t produce their first true leaves, or grow beyond a seedling. We see this trait most commonly with scabiosa seedlings, so we’ll wait until they have their first true leaves before thinning to make sure that the plants we are keeping have active apical meristems.
For direct sown seeds, this is your chance to not only select for the strongest seedlings, but also to thin them to the spacing that you would like them to have in your garden. For example, we direct sow our Hopi Black Dye Sunflowers in clusters of 2-4 seeds every 2 feet. After germination, we select seedlings with the darkest hypocotyls (embryonic stems) because we’ve noticed this trait correlates with future seed coat pigment and dye potential. Beyond obtaining stronger dye pigments from seedling selection, this process also helps with varietal maintenance if you are planning on saving seeds to regrow.


(photo 1) Volunteer weld seedlings that were not thinned in a timely manner, which will make it difficult to thin without disturbing the roots of neighboring seedlings that we will keep. (photo 2) Two Hopi black dye sunflower seedlings: The dark seedling on the right is the one we would keep, and we would remove the lighter colored plant on the left (photo 3) one seedling per cell of dyer’s chamomile after selecting for the happiest seedlings.


(above) For plants like double black hollyhock that can have a higher rate of seed dormancy, we like to over plant seeds into a single pot to save space, and then dibble out the seedlings into their own pots while they are still quite small. For hollyhocks, we like to move seedlings into their own pots before their roots start branching out, as its easier to move them at this size without hurting root hairs. If seeds planted this close together get too large, their roots will be tangled together, making them harder to separate from one another. When transplanting a seedling, make a hole deep enough that the tap root can go straight down and not curling back up, a butter knife can help guide the tip of the root straight down.
Potting Up
Depending on your seed starting schedule and original container size, you may need to pot up your plants. For us, this typically happens when the plants are ready for transplanting, meaning they’ve filled out their cells and are large enough to plant, but the weather isn't cooperating for field planting. If plants stay root-bound for too long or run out of nutrients, they can become stunted or even bolt and flower due to stress. The earlier you start seeds, the more likely it is that you’ll need to pot them up. For peppers and tomatoes, we usually expect to pot them up two to three times. By starting plants in smaller containers, and working them up over time, you save a substantial amount of table space and water. Below is how we pot up Japanese indigo:

(above) These Japanese indigo starts were ready to plant, but our weather was too cold to harden them off and plant them into our fields. They had run out of nutrients and stopped growing, and with warm weather being weeks away, we knew we needed to pot them up. A few of the plants didn’t have a strong enough root system to pull the plants out of their cells by their stems. When this happens, we gently nudge the root ball with a popsicle stick from the cell’s drainage hole, while gently pulling on the stem. This way you’ll have less root breakage when the cell isn’t root bound. Tipping the flat on its side can also be helpful while popping the plants out.


(above) To pot up these Japanese indigo seedling, we simply fill larger flats with potting soil (something with more nutrition than a seed starting mix), then dibble a hole large enough for the plant’s root mass, and then make sure to put enough pressure on the soil around the plant’s roots to get good contact. After potting up your plants, water them in to keep the roots from drying out. We prefer to up pot early in the morning, or late afternoon to prevent the plants from getting stressed during the heat of the day.

(above) Both of these 'Maruba' Japanese indigo plants are the same age. However, just sixteen days before this photo was taken, the plant on the right was up-potted into a larger cell with high-quality potting soil. Meanwhile, the plant on the left remained in its original pot with seed-starting mix, which eventually ran out of nutrients, causing it to stop growing. If you are looking for in depth Japanese indigo courses, we’d recommend checking out our friend Britt Boles’ offerings!
Hardening Off
When your plants have filled out their cells with their roots, and the weather is conducive for transplanting, it is important to acclimatize them to the outdoors before tucking them into your garden. I often compare this process of “hardening off ” to how I transition myself to the outdoors in late spring or early summer: A sun hat, sunscreen, and extra water!
To harden off your plants, you’ll want to move them outdoors, and protect them from strong winds and too much sun. If the difference in temperature is large between your house/greenhouse and the outdoors, you may want to move them outside for just a few hours a day at first. In areas with more extreme weather fluctuations, you may want to take up to a week to get them hardened off, moving them indoors if the temperature drops too low, or if you see hail or strong winds in the forecast. Too much sun too quickly can give your plants sunscald.
Since our starts are grown in an unheated greenhouse, they are already accustomed to big temperature fluctuations and wind from our greenhouse fan, which means they just need a couple days to harden off. During this time, it’s important to make sure they don’t dry out, as the direct sun on your plants and soil, paired with air flow will increase the evapotranspiration rate.
In mild climates, you won’t need to do too much to harden off your plants. If you have any doubts about how protective to be with your little babies, reach out to gardening friends in your growing area or employees at your local nursery for what works best in your bioregion. We can’t stress enough how helpful your local plant community can be!


(left) Some of our starts being hardened off in an area protected from strong wind, and receiving partial shade throughout the day (right) A hardened off madder plant that has filled out its cell with roots (the red alizarin compounds are already visible!), and is ready to be transplanted.
Transplanting
After your plants have hardened off, they are ready to be transplanted into their forever home! We recommend doing a deep weeding of your garden beds prior to transplanting, and fluffing up the soil with a little organic compost. Also, make sure to design your layout ahead of time so you don’t have to stress about it on planting day! When designing your garden, consider what plants have the same water requirements, which plants you want easiest access to (plants that you will be harvesting from most actively), what you would like the aesthetics to be, and what plants need the most sun.
When transplanting, dig a hole slightly deeper than the root ball of your plant, fluff up the soil, then put your plant into the ground. You’ll want to slightly cover the top of your plug with native soil to prevent the peat moss or coir mixture from drying out too quickly. Gently pack soil around your transplant to remove air pockets, but not so tight that the soil becomes compacted. We typically do one foot spacing for the majority of the plants we grow. For plants like sunflowers, hollyhocks, and madder that get quite large, we’ll do two foot spacing.


(left) James holding an armful of volunteer weld plants, which were "weeded" out to make space for Japanese indigo starts that are ready to be transplanted. (right) A Hori Hori, our favorite tool for digging holes for transplanting. It’s much more reliable than a garden trowel (why do trowels ALWAYS bend or break?!). To prevent your wood handled tools from blending into the soil, try adding brightly colored dye scraps, like this wool yarn dyed with ‘prairie sun’ rudbeckia.
After transplanting, immediately water in your plants to encourage the plant plug and your garden soil to integrate with one another. We prefer to transplant early in the morning, or later in the afternoon in order to avoid stressing the plants out during the heat of the day. A cloudy day is ideal for transplanting.
Once your plants are in the ground, make sure they get plenty of sun and water throughout the growing season! We prefer using drip irrigation on a timer, but soaker hoses, sprinklers, or hand watering are all great options depending on your space and available time.
The first garden Guy and I shared was in a small community garden that required a lot of hand watering. We had just moved to a new city, and with Guy often away for work and me still building a friend network, I actually found a lot of joy in the routine of hand watering each day. It gave me a chance to connect with each plant individually, and really get to know how different species reacted to different amounts of water. I often think about how the lack of automation in that garden led to some wonderful moments of calm.
As your plants start to put on growth, consider pinching back varieties like Japanese indigo, cosmos, and marigolds to encourage them to become fuller bushy-plants with more dye material. Avoid pinching plants like sunflowers that will produce a terminal head. If you are new to pinching plants and want to give it a try, we would encourage you to find a detailed tutorial online that will show you when to pinch, which plants are most suited to pinching, and where on the plant should be pinched. There are lots of species specific videos on YouTube! If pinching seems intimidating, don’t stress about it! Some years we are very diligent about pinching, other years we aren’t. Either way we have lots of happy plants. Simply staying on top of harvesting your flowers or indigo will encourage more growth.
What dye plants should you grow?
It’s easy to get overly ambitious when purchasing seeds or plants for your garden, but before you go on a shopping spree, assess a few key factors. Consider the amount and kind of growing space you have available, the duration of your stay at your current growing location, and the dye projects you have in mind.
If you foresee moving in the next year or two, prioritize quick-growing annuals such as dyer’s coreopsis, marigolds, sulfur cosmos, and scabiosa. On the other hand, if you have the luxury of a more permanent growing space, perennials like dyer’s chamomile, lance-leaf coreopsis, madder, black-eyed Susan, and others can enrich your dye garden, and provide you with plants that do not need to be regrown from seed each season.


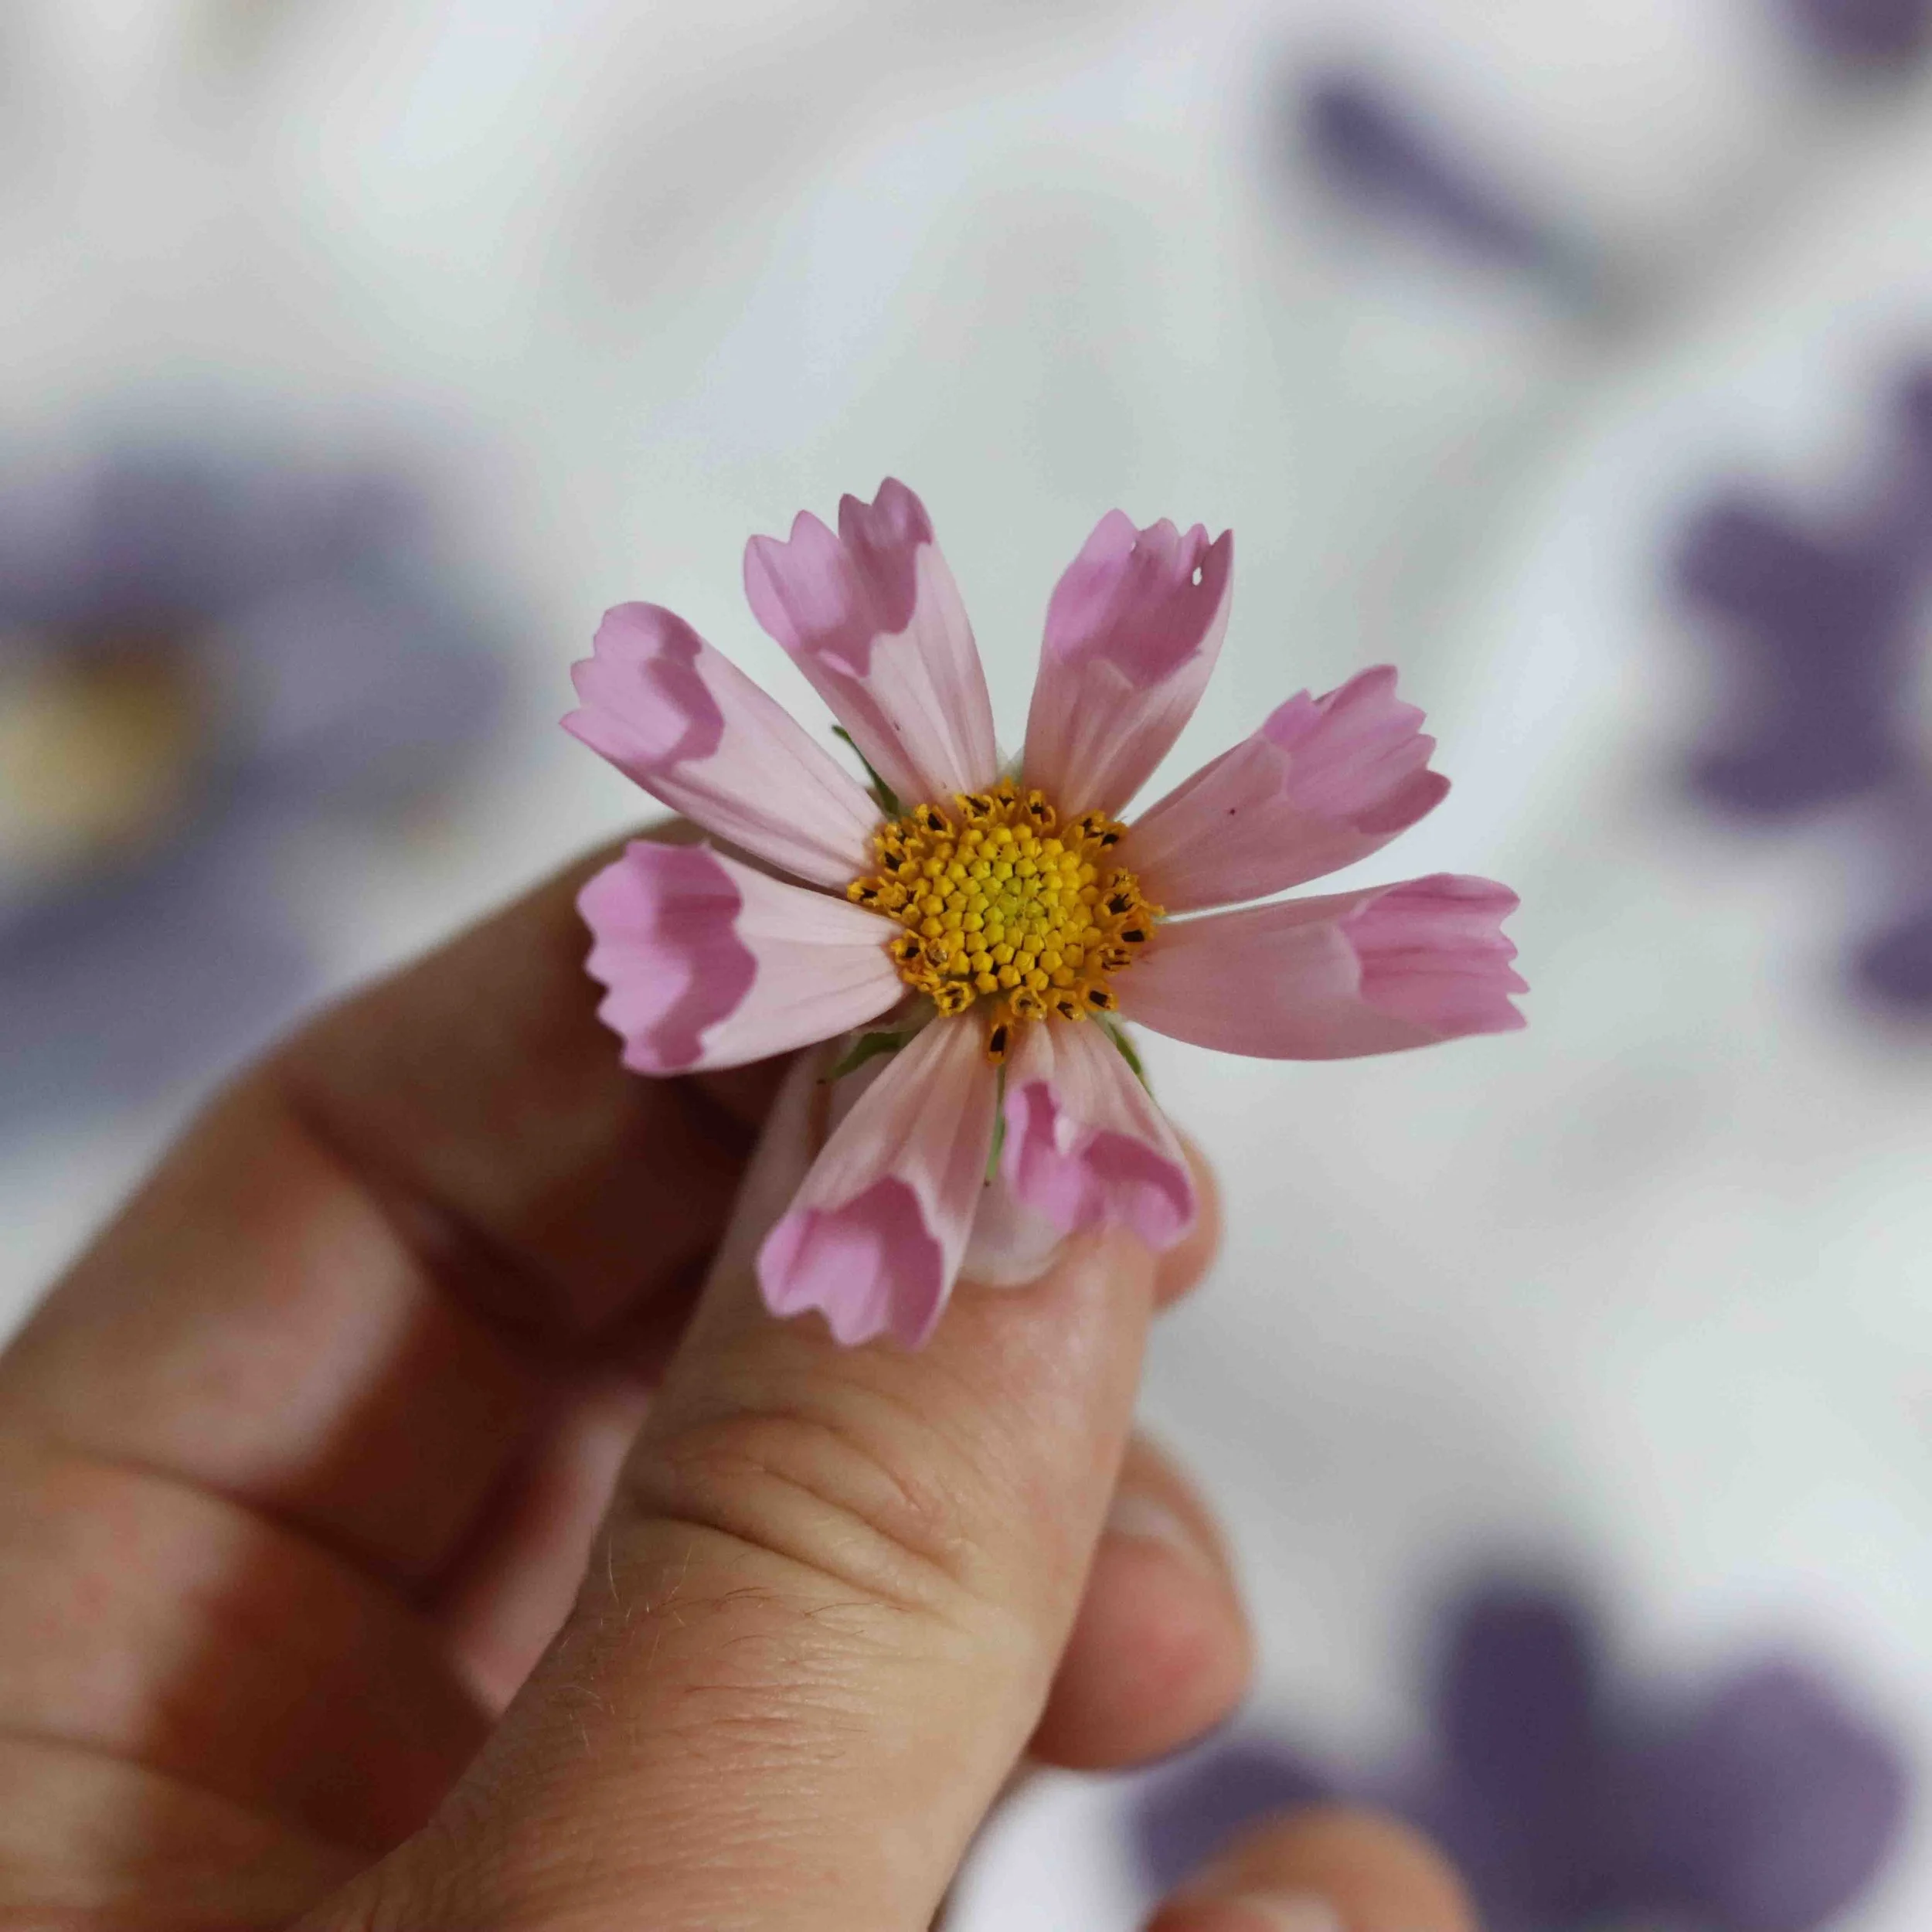
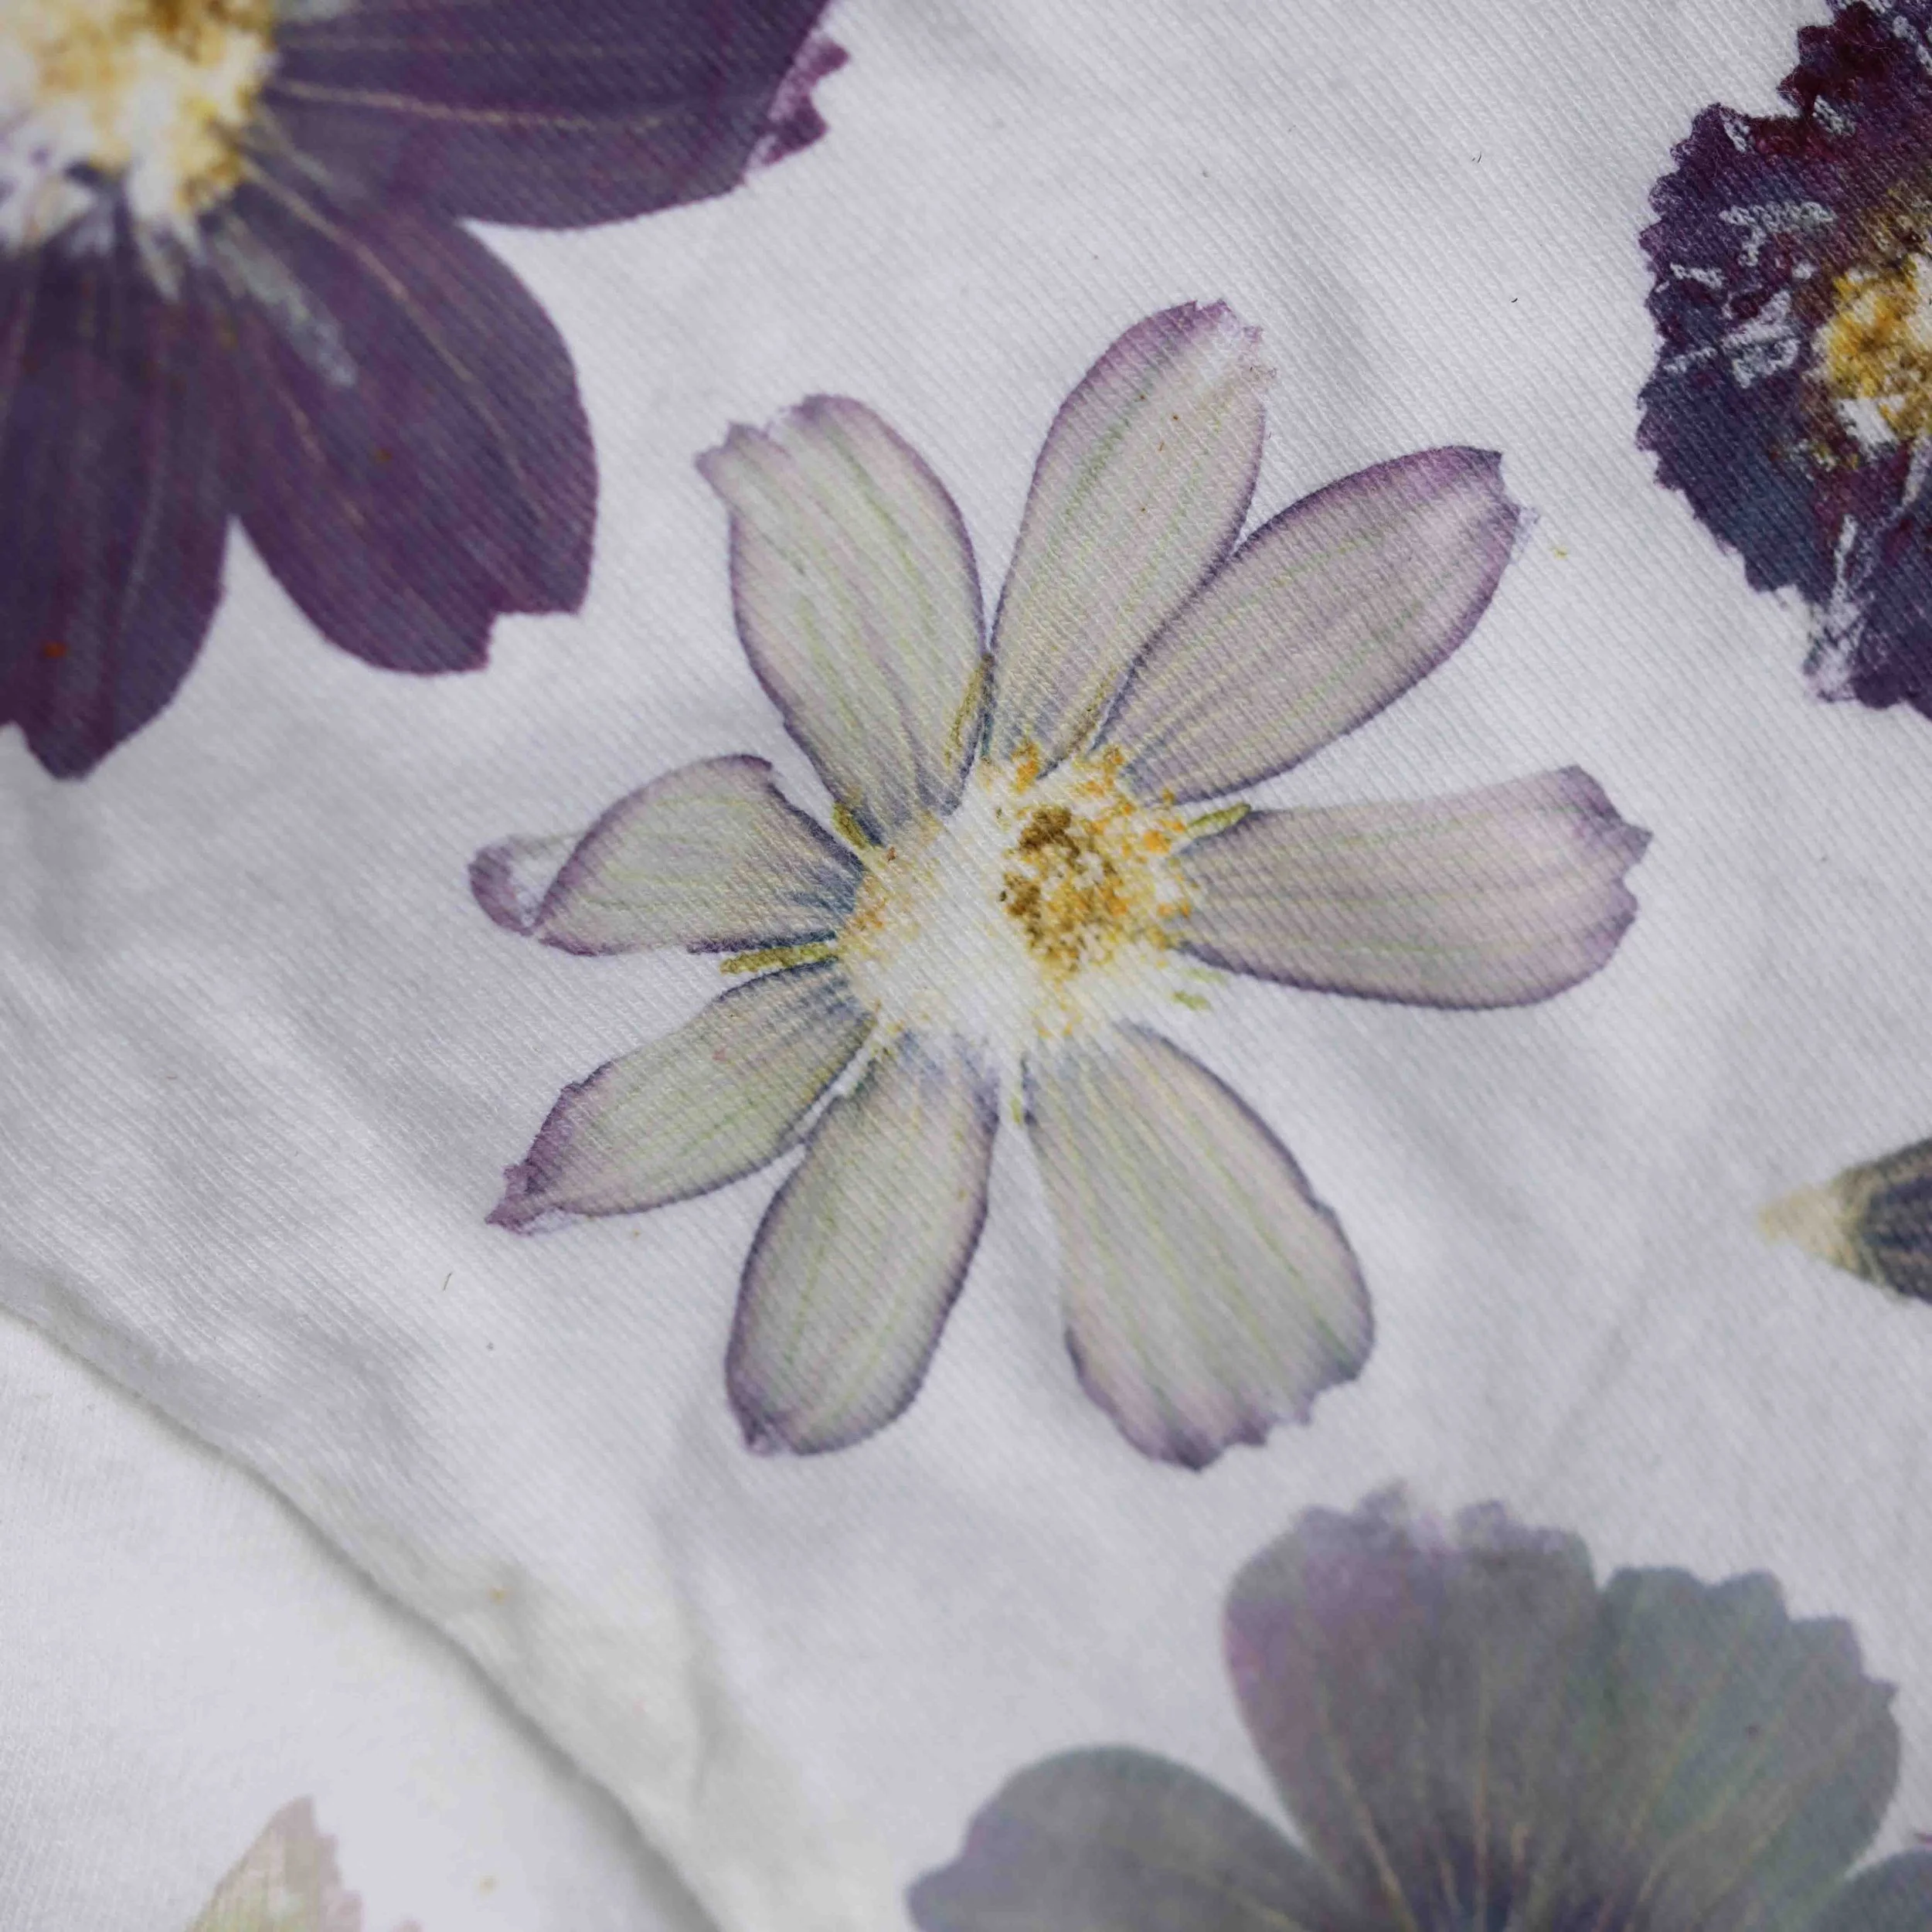
(above) Cosmos bipinnatus is a fast growing annual that makes excellent prints on fabric. The Dogwood Dyer’s Bundle Dyeing + EcoPrinting workshop gave us some good insights on how to get these super crisp tatakizome flower prints. (below) ‘black knight’ scabiosa (pincushion flower) from seed to tatakizome print. This shirt was printed years before learning valuable tips from the aforementioned workshop, you can see that it has a more “rustic” vibe with its blurry margins. The seeds we sell for scabiosa have been removed from their shuttlecock-looking seed structures (epicalyx) that are pictured, this improves our germination rates.


Equally important for dye plant selection is determining the colors you aim to harvest and the intended use of your plants. Many flowers ideal for eco-printing are annuals, serving as excellent entry points into the world of dye plants. For a diverse color palette, consider kickstarting your garden with primary colors: Japanese indigo for blue, madder for red, and weld or dyer’s chamomile for yellow. Once you've creating a relationship with these three colors in your garden, the potential for creating a myriad of colors on natural fibers becomes significantly broader through thoughtful layering. Madder roots take three years to mature, so we recommend introducing this plant to your garden as early as possible if you are interested in natural reds.

Lightfast primary colors (left) madder (center) weld (right) Japanese indigo
Best Dye Plants for Container Gardening
There are many great dye plant options if you are opting for container gardening this season. Our top three dye plants for planted pots are tango cosmos, marigolds, and dyer’s chamomile. These plants are easy to grow from seed, are very tolerant of living in pots, and are prolific bloomers. French marigolds like our ‘flambé’ French marigold mix are great for smaller pots due to their shorter compact stature, and taller marigolds like our ‘shades of gold’ marigold are good for larger containers. Dyer’s chamomile is a perennial that will bloom the first year, and have more blooms in subsequent seasons.


(above) From seed to closet with ‘shades of gold’ marigold
When cultivating plants in pots, it's crucial to maintain consistent watering habits due to the accelerated drying of soil compared to garden beds. Since plants' roots have limited space to search for nutrients and moisture, it's essential to ensure their pots provide everything they require. Opting for a high quality potting soil with excellent drainage is best. If you notice signs of chlorosis in your plants, consider applying a mild supplemental fertilizer.


(above) Dyer’s chamomile fresh, dried, bundle-dyed on cotton, and immersion dyed on wool. Note: if you keep your dye materials in clear glass jars like this, remember to store them away from sunlight to preserve the color. (below) Tango cosmos, one of our favorite hot weather annuals, from seed to dye bath. These two varieties are among the easiest dye plants to grow from seed. They both can be direct sown or transplanted. Dyer’s chamomile prefers to be sown earlier in the season, while tango cosmos prefers warm soil in late spring through early summer.


What zone are you in?
We recommend that you become familiar with your U.S. Department of Agriculture (USDA) cold hardiness zone. Understanding your zone is a crucial factor in determining your optimal timing for seed-starting and the types of plants suitable for your location. USDA cold hardiness zones describe the average lowest temperatures for an area over the last 30 years. A USDA zone 6 for example is applied to areas with average lowest temperatures from 0 ºF to -10 ºF. Half zone terms break zones into two subgroups of temperatures the lower half i.e. 6a (-5 ºF to -10 ºF) and the upper half i.e. 6b (0 ºF to -5 ºF).
The temperatures in your area can still experience record lows and highs. So, a plant from a warmer climate that has lived happily in your garden for several years may suffer damage or die without protection. That said, well-established plants living outside areas of their typical zone can surprise you.
You can find your local zone by using the interactive map on the U.S. Department of Agriculture’s (USDA) plant hardiness zone website. The website has other helpful information about understanding the maps as well as free downloads of zone maps. For gardeners outside of the U.S., a quick internet search will help you find a hardiness zone map for your country.
Spring Fiber Prep!
As you gear up to order seeds for your dye plants, take a moment to decide on the mordants, modifiers, and natural fibers you'll be working with throughout the upcoming season. Spring is a great time to stock up on these essentials, ensuring you have everything you need at your fingertips. A little planning at the beginning of the season can help you make the most of your fresh dye materials!
Having pre-scoured and pre-mordanted materials will allow you to seamlessly dive into your projects when inspiration strikes throughout the growing season. We prefer to do some bulk scouring and mordanting between March and May, before the hectic growing season is in full swing. Botanical Colors is an excellent place to get your mordants, and they have wonderful information on how to use them!
Note on organization: Store your fibers in labeled containers to avoid any mix-ups with unmordanted materials. We like to have an “inbox” of things that need to be scoured/mordanted, and then another bin with dye-ready materials.


(above) Drying scoured and mordanted wool (we were so lucky that this bird didn’t drop a tannin rich bomb on this fresh skein) and mordanting cotton for a quilt.
We hope you’ve enjoyed this post!
For more growing information regarding specific dye plants, please visit the dye plant section of our catalog. We are currently working on some informative blog posts about gardening and dyeing that will be released throughout the year, and can’t wait to share them. Join our newsletter to receive updates about blog posts, dye materials, and new and returning seeds!
If you are interested in books for natural dyeing, we have Inside Indigo and The Art and Craft of Natural Dyeing available in our shop. For those interested in using natural dyes for quilting, check out Farm and Folk’s beautiful book, Quilt Alchemy.
We hope you’ve found this blog post to be informative and enjoyable! A heartfelt thank you to Liz Spencer of The Dogwood Dyer for including a previous version of this post in A Year in Natural Dyes last year! We’re avid subscribers, and Liz's meticulously researched insights have greatly enriched our dye projects. We hope that the information we’ve provided is beneficial as you embark on your upcoming season.
HAPPY GROWING! If you enjoyed this post, consider signing up for our newsletter at the very bottom of the page!

(above) Summer’s bounty. Flowering Japanese indigo, flowering tango cosmos, weld that has gone to seed, and a tote of ‘Mardi Gras’ dyer’s coreopsis (the whole dyer’s coreopsis plant can be used for dyeing).